RDP Session Keeps Disconnecting

RDP Session Keeps Disconnecting

Background and Behaviour

After migrating our virtual machines (VMs) from AAPT’s virtual datacentre (AAPT vDC) to Telstra’s Cloud Infrastructure (Telstra.Cloud Shared) we have observed, that after a period of inactivity, our RDP sessions to our Windows VMs keep getting disconnected.

It seems the default VM created when you add a new Windows 2012 R2 server to the Telstra Cloud Shared infrastructure has a setting that enables RDP session disconnection after some idle period as all our VMs consistently exhibit this behaviour.

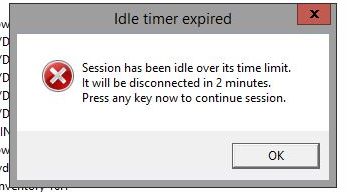
Below is what we would get in our RDP sessions after a few minutes of inactivity.

Session has been idle over its time limit. It will be disconnected in 2 minutes.

RDP-session-keeps-disconnecting-1

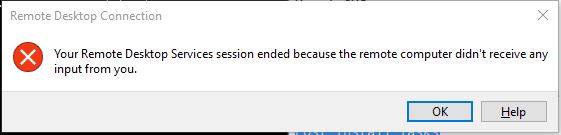
Your Remote Desktop Services Session ended because the remote computer didn’t receive any input from you.

RDP-session-keeps-disconnecting-2

This has annoyed our system admins as all their works and opened windows keep getting terminated that eventually we opened a ticket with Telstra Cloud support. However, after hours of troubleshooting and patiently waiting after every change of setting the problem was never really fixed. 

What we’ve tried

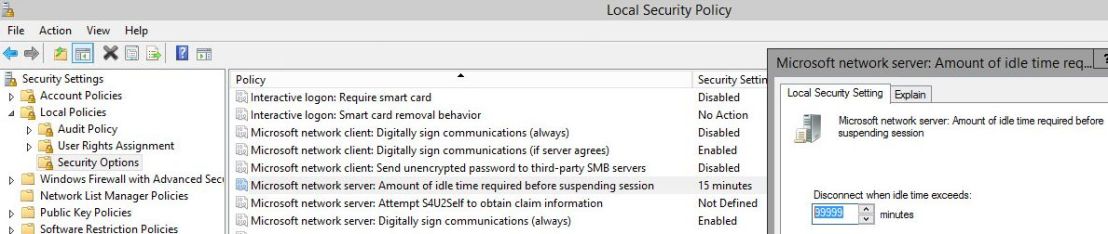
Opened Local Security Policy and went under Local Policies > Security Options > Microsoft network server: Amount of time required before suspending session. We changed this setting from the default 15 minutes and set it to the maximum value of 99999 (or 208 days). Unfortunately, this didn’t fix the problem.

RDP-session-keeps-disconnecting-3

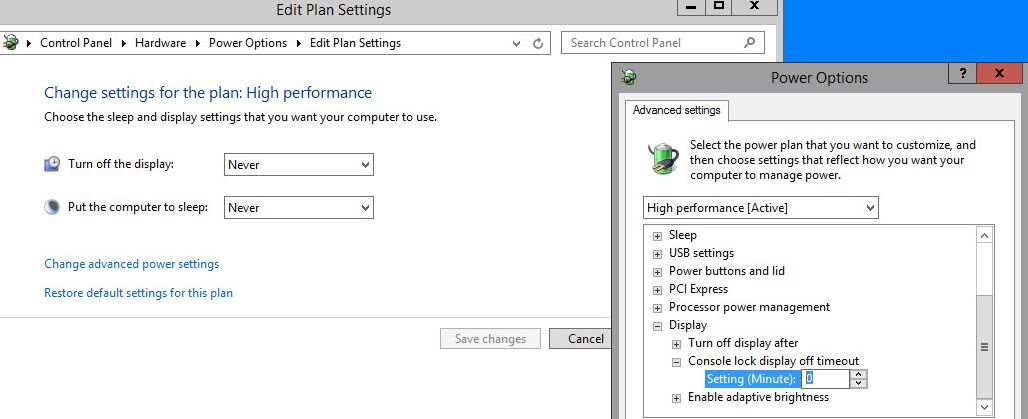
In our second attempt, we enabled the Console lock display off timeout setting in the Power Options via registry and set it to 0 (see this link). Again, this didn’t fix the problem.

RDP-session-keeps-disconnecting-4

Solution

I observed that around the time of disconnection the Event ID 26 below is logged in the System Event Viewer.

RDP-session-keeps-disconnecting-5

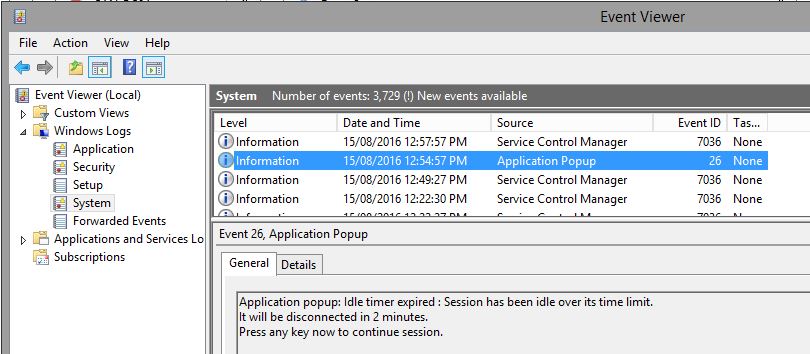
This behaviour happens since a policy setting enforces a time limit for idle Remote Desktop sessions.

What finally fixed it for us are the steps below.

  • In the Windows server, run gpedit.msc to open the Local Group Policy Editor
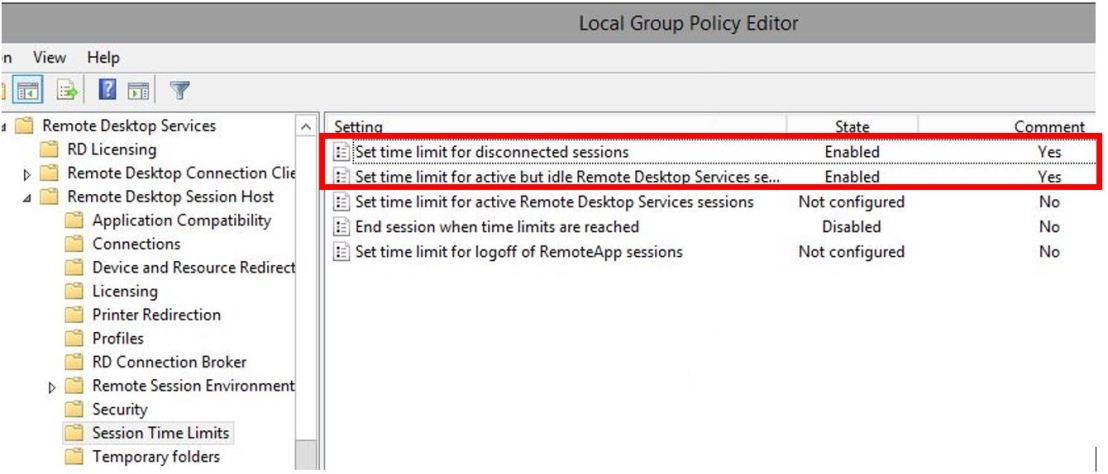
  • Go to Computer Configuration > Administrative Template > Windows Components > Remote Desktop Services > Remote Desktop Session Host > Session Time Limits
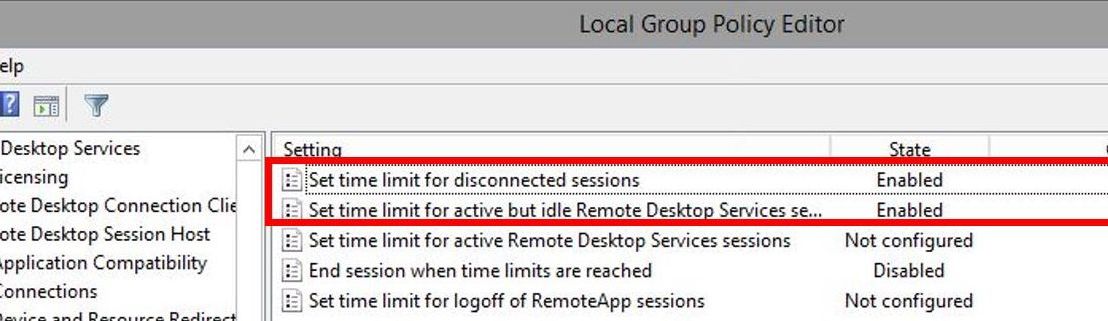
  • Set both entries highlighted below to Enabled and Never

Set time limit for disconnected sessions

Set time limit for active but idle Remote Desktop Services sessions

RDP-session-keeps-disconnecting-6

Hope this helps anyone who has been annoyed by this Windows behavior.


Extending Windows 2012 R2 Trial Expiration (beyond 180 days)

Extending Windows 2012 R2 Trial Expiration (beyond 180 days)

Background

One thing I like about Microsoft is their software trial program where you can download a fully functioning trial copy of an enterprise software from the Microsoft Download Center and use it for a good 3 to 6 months. Some software vendors only let you try theirs for a month and some even put limitations on what you can do with their software during the trial period.

Allowing me to test a software prior to buying it makes my job easy as in past projects I’ve worked on a standard approach is to implement a proof of concept (PoC) prior to pilot testing and deployment.

Problem

Unless you work for an MSP/integrator which can Microsoft volume licensing, the only option to test Microsoft software is to download trial copies from their website.

There were times however that even the 180-day trial (in the case of Windows 2012 R2) isn’t enough that an extension would be nice :D. This post shows a quick way to extend or rearm a trial copy of Windows 2012 R2.

Solution

1. Open an elevated command prompt and run the command below

C:\Windows\System32\cscript slmgr.vbs /dlv

The /dlv switch will allow you to display the current trial status – how many more days left (expiration) and how many more times you can re-arm the Windows trial.

The result would show something similar to the below.

windows-trial-rearm1

If you forget to keep track of your Windows trial the effect is such that Windows will keep shutting down (every few hours in my experience). Obviously, good system administrator practice means making sure you keep track of warranties, expiries, etc and working on a plan before it happens. When the 180-day trial is over, the below will show when the same command above is run.

windows-trial-rearm2

2. To extend the trial run the command below and restart the server.

C:\Windows\System32\cscript slmgr.vbs /rearm

The /rearm switch will reset the timer to 180 days (or in other words another 6 months for you to continue testing Windows 2012 R2!)

windows-trial-rearm3

After the server is restarted, running the first command confirms the extension. Also, notice the rearm count has gone down by 1.

windows-trial-rearm4

Happy days!

Allowing PSEXEC on Windows 10 PCs

Allowing PSEXEC on Windows 10 PCs

Background:

PSEXEC is nice little command line utility that I’ve had to use for many years now in managing and troubleshooting Windows PCs remotely. Psexec is part of the PSTOOLS collection by the famed Mark Russinovich. The latest version of Psexec can be downloaded at https://technet.microsoft.com/en-us/sysinternals/pstools.aspx

With Windows 7 and below, as long as you have domain admin rights you are able to run psexec without much drama. Unfortunately, with Windows 10 it isn’t as simple as before as there are plenty of reports of Windows 10 denying your Psexec connections. An example problem widely reported is below.

Allowing-psexec-Windows10

Solution:

To fix this you will need to allow 2 ports – TCP/445 and UDP/137. However, you will want to ensure only the IP addresses of admin PCs or servers are allowed for security reasons.

You will notice that if the remote Windows 10 firewall is disabled, the connection is allowed immediately.  With this fix, the connection can take from 10-15 secs but will be allowed eventually.

Steps:

  1. Connect to the affected Windows 10 PC using your favourite remote access tool (eg VNC, RDP, etc).
  2. Open an ‘elevated’ CMD prompt and enter the commands below (you can copy and paste this 2 lines in one go).
netsh advfirewall firewall add rule name="Allow PSEXEC TCP-445" dir=in action=allow protocol=TCP localport=445 remoteip=(your admin/server IPs here separated by comma and no spaces)

netsh advfirewall firewall add rule name="Allow PSEXEC UDP-137" dir=in action=allow protocol=UDP localport=137 remoteip=(your admin/server IPs here separated by comma and no spaces)

3. Now try to run psexec on your PC using the command below

psexec \\<pc name> cmd

Finally, you are in!

Allowing-psexec-Windows10-2

4. Type exit to close PSEXEC session and return to CMD prompt.

Restoring hard disk partitions on new SSD (using a bootable ShadowProtect USB stick)

Restoring hard disk partitions on new SSD (using a bootable ShadowProtect USB stick)

Background:

With the popularity of Solid State Drives (SSDs) it’s not uncommon nowadays to delay or even scrap the idea of upgrading ‘still relatively ok’ computers and save some money in the process. Instead, a popular approach has been to simply upgrade the old SATA drive (or low capacity SSD) on the computer and replace it with a new and higher capacity SSD.

The obvious challenge would be on how to get Windows and, if you’re like me, all those dozens of software re-installed on this new drive. The traditional approach has been to go through the whole process again, inserting that Windows DVD, looking for those license keys, re-downloading installation files, etc and effectively spending hours if not days building this computer.

I have had to do this a couple of times in the last year or so and thankfully the technology nowadays is so straightforward. Gone are the days I would lose time and sleep getting the PC back before the wife and kids wake up 🙂

What you need:

  • Bootable ShadowProtect USB
  • New SSD drive
  • External USB/flash drive containing the ShadowProtect partition backups of the old computer

Steps:

Preparing the SSD drive

  1. Insert the new SSD, bootable ShadowProtect USB, and the External USB (with your backup images)  in the PC.
  2. Power on the PC and go to the BIOS to confirm presence of the new SSD then restart the PC.
  3. When the PC manufacturer logo shows up (eg Dell in my case) press F12 to trigger the one time boot menu.
  4. Select UEFI: <Your bootable USB drive>
  5. ShadowProtect will boot and ask if you want to start network support. Click No.   Restoring-Partitions-1
  6. Set correct Time Zone
  7. The Initialize Disks window will pop up detecting the new SSD. At the bottom, click Initialize as GPT diskRestoring-Partitions-2
  8. Click OK to write a signature to the SSD then close the Initialise Disks window
  9. Go to Disk Map and notice the SSD (Disk 0 in this case) has created two new partitions (96MB and 128MB).Restoring-Partitions-3
  10. Delete these two partitions. Note the idea is just to create a GPT initialized SSD is ready for restoring the ShadowProtect backup images.
  11. To confirm, that the SSD is set as GPT, go to Tools – Disk Partitioning and type the below command:
    list disk

    Restoring-Partitions-4

Restoring Images

  1. In ShadowProtect, go to the Wizards tab and click Restore Wizard
  2. Select Restore, click Next
  3. Click Browse and select the EFI Partition backup. The EFI partition is tiny system partition in GPT used by computers adhering to the Unified Extensible Firmware Interface (UEFI)
  4. Right click the Unallocated space (under Disk 0) and select Create exact primary partition at the beginning of free spaceRestoring-Partitions-5
  5. Set Partition Type to EFI System Partition then click Close
  6. Click Next three times then click Finish.

Restore the remaining partitions in similar way to Steps 1 to 6 but using the information in the table below

Partition Partition Type
C: or OS Windows Basic Data
WinRE Windows recovery

Finally, close ShadowProtect, restart the PC and unplug the USBs.

Windows should load on the new SSD with all the software and files in the old disk carried across.